Script for Solar CITIES 3 IBC Biodigestor and Gas Holder System Tutorial Video
by T.H. Culhane and Janice Kelsey
copyright 2022 Solar CITIES


I think it’s still hard for most people to appreciate just how simple it is to build and operate a home biodigester - and this after almost 14 years since we innovated the IBC tank biogas system in the trash recycling community of Cairo, Egypt and seven years since we at Solar CITIES published our first open-source DIY video tutorial on the world-wide web.
Perhaps we STILL want to justify the centuries of suffering that could have been avoided if we had simply taught and encouraged one another to easily transform food and toilet “wastes” into clean fuel and fertilizer. Women and children, in particular, could have been empowered to help society eliminate ALL household and domestic organic wastes. With that knowledge, even deadly scourges like the bubonic plague could have been avoided.
Alas, the Global North didn’t listen even when Marco Polo returned to Europe from his far east voyages of discovery and described the domestic dragons he observed keeping the streets clean in China. The biogas solution was well known in some parts of the world for thousands of years but the rest of us have been disastrously slow to catch on.
Fortunately, awareness is growing and a new day is dawning that promises a bright future ahead if we can teach everybody how to turn their food wastes into fuel and fertilizer and stop thinking of what we prefer to call "organic residuals" as something to be thrown away. As.we say at Solar CITIES, there is only one place for garbage, and that place is “in the past”.
Today our international team of innovators and practitioners is proud to share with you this update on our now famous IBC-tank biogas system which, after a decade of testing in over 50 countries, now proves to be the simplest, most affordable and durable way to make your own biodigester AND gas holder and do so ALL out of local plumbing materials you can find almost anywhere on the planet.
There have been many improvements since we started in the Zaballeen community on the outskirts of Cairo and the ancient inner city area of Darb-Al Ahmar all those years ago, culminating in our work this week in the historic holy land villages and cities of Palestine and Israel.
So let us now show you how you too can do it – the Solar CITIES Solutions way!
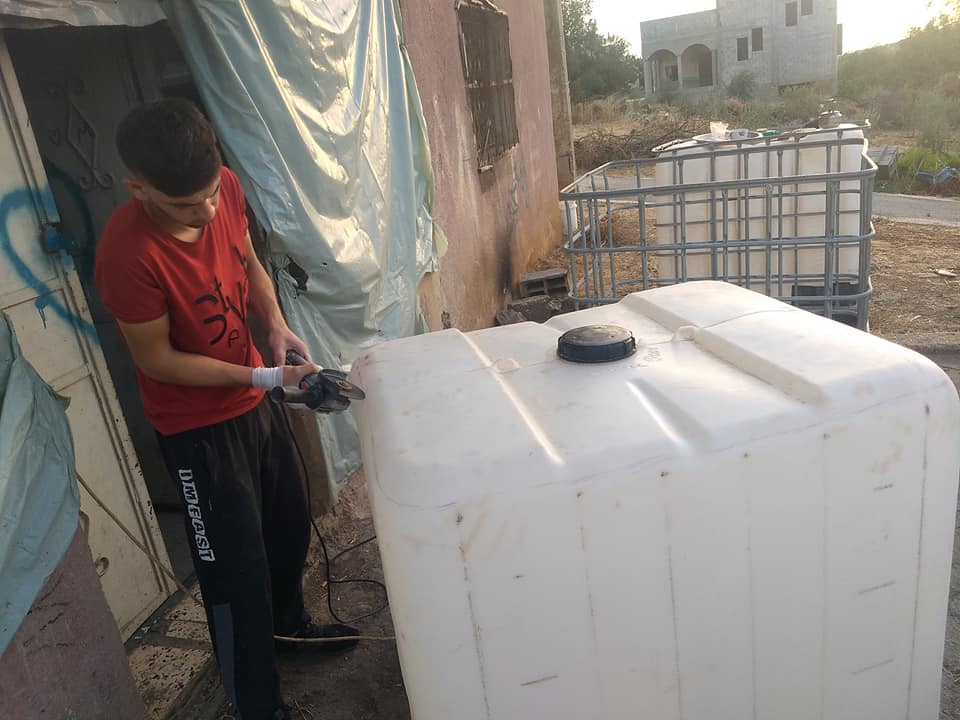
First – get yourself THREE used IBC tanks. We found these in a junkyard here in the West Bank near the village of Bruquin for only 75 Shekels each. Having three will give you the most complete system for year-round operation – from them we can build the usual IBC tank digester AND a floating gas holder system.

If you can only get one tank you can build the usual Solar CITIES digester but will need to figure out how to store the gas (truck inner tubes and PVC bladders and air mattresses have always worked for us!) If you can get just two tanks we recommend you start your project with a floating gas collection system that can be plumbed so that you still have an effective biodigester all in one. This is what we are recommending to most folks these days. However, since floating drum systems are open at the top they can’t be easily insulated or heated and thus won’t work so well in the winter months – that might not matter if you build it in a heated shed or if you live in a warm climate (and might not matter to many of us if we don’t get climate change under control!)
Certainly household and community scale biogas is one way to mitigate climate change so let’s get on it!
We’ll start with the Solar CITIES Floating IBC tank gas holder that we developed years ago in the Tamera Ecovillage in Portugal because it can also double as your sole biodigester system. It is like building an ARTI India household digester but made entirely out of IBC tanks.
14 years ago when we first experimented with this in Germany we were able to find a 700 liter IBC that fit inside a 1000 liter IBC tank so we simply replicated what we learned from Dr. Karve in Pune India using different materials. But since then we have found it really hard to find smaller IBC tanks in most other countries. Working with Martin Funk of the Global Eco-village Network however, we figured out the best way to fit two standard IBC tanks inside one another and still let the gas holder freely slide up and down. This is what we want to share with you today!

Begin by removing the top bars of the metal cages of your two designated IBC tanks. If you have the right star bit you can unscrew them. That is best. But if not you can use a grinder or even a hacksaw.
Next, remove the tanks from their cages.
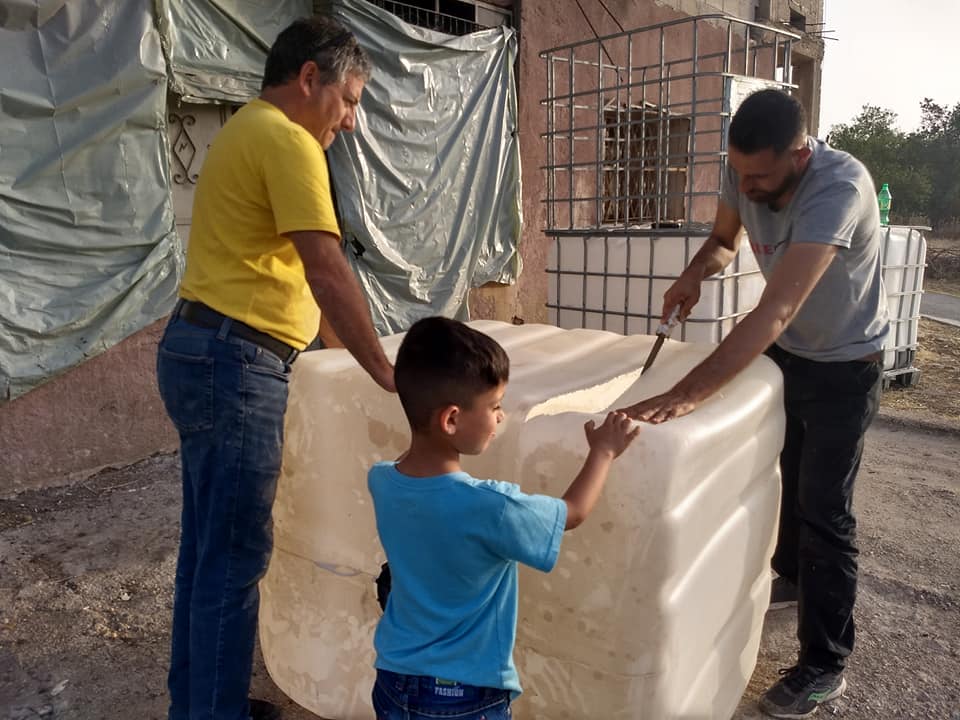
Lop off the top of one of the tanks as close to the curve as possible. We find a grinder works best, but we’ve also had to use a saw many times and it’ll work.
This tank will hold the water in which your gas holder will float. It can also be inoculated with methanogens and serve as a primary or a secondary biodigester body.
Now turn the SECOND tank on its side with the drain valve facing up, skyward, and lop off what now appears to be the bottom (it is actually the far side opposite the drain). You can measure this if you like – the idea is for it to sink completely below the water line of the bottom lank when empty of gas. A good rule of thumb for most tanks if you don’t have a measuring tape is to cut it where most tanks have their second bulge.


Now you are ready to to build a Solar CITIES floating gas holder digester from two IBC tanks.
Place the rotated tank open side down in the first IBC with the drain valve facing up, and make sure it settles below what will be the water line. This will enable water to push out all the gas when using it. If it still stands a bit too tall, you can take it out and cut it down a bit, as Culhane does, or simply leave it sticking up a bit, as Kelsey does. Either way it will work -- if it sticks above the water line that dead space will eventually fill with biogas and even though you won't be able to get it out when the tank settles, that's no big deal. Don't stress about it.


Make sure the lid of the gas holder tank has no holes and has an intact O-ring. If not, fill it with silicone and screw it on tight.


Drill a hole for a half inch bulkhead fitting on what is now to be considered the top of the tank (what was previously the front side of the tank where the drain is). If you don’t have a drill, as happened to us in Palestine recently, use a piece of charcoal like we did and burn the hole through. Once the plastic is soft you can make it the right size with a steel pipe. You can also heat up a steel pipe and use that to make the hole. Smooth the plastic with sandpaper so the rubber washer in the bulkhead fitting sits flat and doesn’t leak.
Insert the bulkhead fitting from the inside and apply silicone under the rubber washer for added security. Fit the locking nut on the top and connect your pipes. For this tank, because we are using the system as both a stand alone digester AND as the gas holder for a sealed IBC tank digester, we put a T fitting and two valves.
One will take gas from your third IBC digester and the other will let gas out to the stove.


As you may notice there is plenty of room on the long sides of the tank but hardly any on the short sides. This is the trick to using two identical-sized IBC tanks for a floating gas holder. It is a question of geometry. We no longer have to find different sized IBC tanks to replicate the ARTI India floating gas system using international intermediate bulk containers. One size serves all!
You may also note that the first IBC only fits the intended floatation tank because the HDPE plastic sides are flexible and bow out a bit.
This means we’ll never get them back in the cage easily and if we force them in the floating tank will certainly get stuck and won’t rise or sink.
Technically you could skip the cages completely and of course we have experimented with that and made it work on occasion but we have our doubts about how long these systems will last before plastic fatigue sets in and the floating tank has a tendency to fall over.
So for the past 7 years or so we’ve been simply modifying the cages to fit the tanks by removing some bars on the sides and bowing out the sides.


You can use a hacksaw for this, or a sawzall, but we find that a grinder works best and is the safest for the metal cage, just as we found it worked best and was the safest for cutting the tank plastic. The trick is to cut 5 of the 6 inner vertical bars on the long sides of the tanks only. Cut them at the top and bottom first and then make a cut just above each horizontal bar. The one to leave in (if you like, you don't have to!) is the one closest to where the drain valve area of the tank is.
This is because, when you insert the 3 inch feed pipe on that side, you might want the extra reinforcement and meanwhile the floating tank itself will be pushed back to the rear of the floatation tank. This is where we want the bar cut so it doesn't impede the tank from floating up and down.
Once they are cut, take a hammer and bang the bar to the side from the lowest part of the cut, using the long side of the bar you are banging on as a kind of lever to crack the weld on the horizontal bar.
Make sure to wear protective goggles and gloves and keep friends and family and children and pets as far away as you can. You can keep your enemies closer, as the saying goes, if that is the kind of person you are, but to be an ethical person you should still warn them about the impending projectiles! Seriously, you’d be surprised how far these metal pipes can fly when the weld finally cracks under your last blow. Try to this part of the job away from windows and cars and property you don’t want damaged!

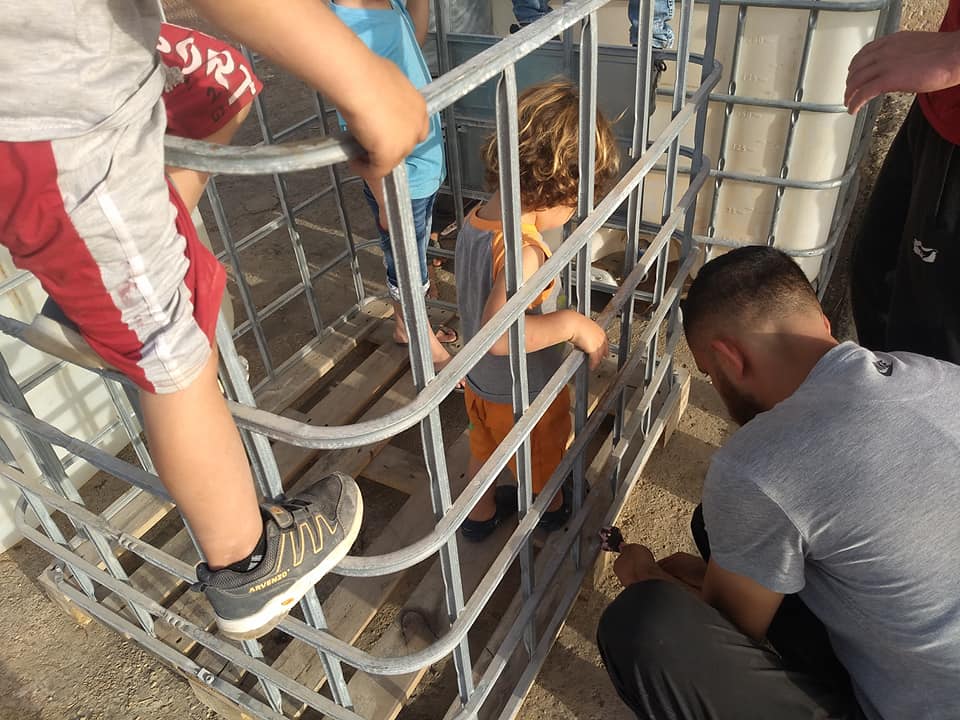
Once you have removed these 10 center vertical bars, 5 from each long side, turn the cage on its side and simply climb in the cage and press with your legs and back to widen the cage on the sides. We recommend you do it from both sides by turning the cage over so both long sides bow out in the middle. We have left the two vertical bars closest to the corners and all the vertical bars on the short sides for structural integrity to hold the tank in place securely when filled with water.
Now when you put the two tanks inside the cage they should fit like a loose glove.
You want this because the idea is for the gas holder tank to freely rise up and fall down as it fills with gas and as the gas is used.
That wasn’t so hard was it?
Now, you can leave things as they are and you have a fully functional gas holder to use with a dedicated solar cities IBC bioidgester all year round – we have done this and filled the flotation tank with salt water or with water and anti-freeze so it keeps working no matter the weather. The only final step if you are using these two tanks simply to store gas is to make the same modifications to the original cage of the gas holder tank and tie it with wires or zip ties to the cage below to keep it from falling over and hurting someone. The top cage will then hold the gas tank in place as it rises out of the water.


To prepare this cage you will need to either unscrew the palette from the cage or cut the cage off the palette with a grinder. We recommend unscrewing the cage if you can find the right screwdriver bit or torque wrench bit depending on how it is fastened down. That way you don’t have any sharp edges, the palette can be sold or used for other things and you can repurpose or sell the screws.
Cut the 8 side vertical bars (leaving two on each side for stability) and bow the cage out exactly as you did for the bottom cage.

You could stop there and move on to your third tank, the primary Solar CITIES IBC digester, but imagine if you were only able to obtain or afford two tanks rather than three, or if you didn’t have the space for the entire system or the time to make it all. At Solar CITIES Solutions our MISSION is to ensure that EVERYBODY on earth (and eventually off-world too!) has access to safe, affordable solar energy with biogas being the most accessible form (that’s why we are called Solar CITIES yet focus so much of our education and outreach on biogas – biogas is stored solar energy available 24/7 rain or shine. Your gas holder is actually a kind of big solar battery!).
Our decades long experience with IBC tank biogas in so many different settings has shown us that the floating IBC digester is actually the simplest most effective and safest Do-It-Yourself Way to jump into the joys of biogas at a practical scale.


To turn you now completed floating IBC gas holder into a digester too, all you have to do is put in a feed pipe and a fertilizer out pipe and you are done.
It just so happens that the space created by the rotated rectangular IBC on the long side nearest the drain valve where there is a hump in the plastic surrounding the drain is just wide enough to comfortably fit a one meter 3 inch pipe with an elbow and half meter 3 inch extension pipe. Thus you don’t have to do any drilling or cut any holes to put in your feed pipe and you don’t risk doing any damage to the tanks.
That is what makes our innovative use of IBC tanks so effective (and actually a darn sight easier than making an ARTI style digester out of much more expensive cylindrical water tanks which must be different sizes to work!).
You simply fit together the standard one meter 3 inch pipe to the elbow and cut another 1 meter pipe in half and connect it to the elbow. Slide this L shaped pipe down into the water holding tank at one of the corners with the horizontal pipe laying along the side where the drain is, slightly lift the gas holder tank and then twist the pipe underneath so the horizontal section of the pipe is now facing diagonally into the center of the tank.
Make two small holes in the bottom IBC tank’s plastic at the very top where it curves a bit on either side of the pipe and use zip tires or wire to hold the pipe firmly in place, nesgteled in the corner. We also tie it to the upper part of the metal cage for added strength and stability.
Now fit onto this pipe a 3 inch Y fitting so it extends out past the top cage for easy access to feeding.
Now you have a good feed pipe. Since 3 inches is a bit small for pouring in food waste, get a 45 degree elbow and a 4 inch to 3 inch adapter. Use pieces of the remaining half meter of the 3 inch pipe that you cut to connect with the elbow and assemble so that when the top cage is on you can easily pour food in.


The penultimate step is to drill or melt or cut a 3 inch hole in the opposite side of the lower tank’s drain valve quite near the top. Then put a two inch uniseal in this hole and press in a 2 inch (50mm) elbow. Connect two more elbows to the first one so that you have a hole that faces down and attach at 1 meter piece of 2 inch pipe that you can put into a bucket or into the remaining piece of the IBC tank that you cut off which now can be used as a kind of fertilizer basin. (The top of the other tank can be used to cover it from rain or animals!).
There really is no waste with this method!

Now you have a fertilizer outlet pipe that will spill over into your bucket or IBC basin whenever you add food waste and the water level rises.
You can easily adjust the height and rate of the overflow by twisting the elbow in the uniseal on the fly.

The final step here is to paint the bottom tank and the top of the gas holder tank black to absorb solar heat and avoid algal growth (algae can generate oxygen in the tank and kill off your anaerobic microbes). You can also paint the entire gas holder tank but over time the paint is likely to wear off as it rises and falls in the water. In any event when the tank is empty and you are heating things up to produce gas it won’t let much light in. More research needs to be done on these systems to see if it is worth the effort and cost of paint to try and make the telescoping sides of the gas holder black and opaque.
The only thing left to do for this part of your adventure into biogas is inoculate with animal mature or duck pond muck and wait a few weeks for your first flammable gas before feeding.
Now, look ma, you have a fully functional and effective Solar CITIES floating IBC tank biogas system that can produce and store up to two hours of cooking gas a day from one bucket of ground up food waste. It is arguably (and we love to argue!) the simplest, least expensive most effective stand-alone DIY way to get a truly useful amount of biogas and fertilizer from an average family’s food waste that we’ve yet discovered and so this is where we always start these days.
But wait! Of course there is more. While you can use this biodigester for decades as your sole biogas solution, you will find it does lose heat in cold months and thus it doesn’t perform all that well in winter. A larger feeding tube would also be more convenient.
You may want to do as we do and connect it to an improved Solar CITIES IBC tank primary digester, or you may want to use it as extra gas storage space when you upgrade to a professional HOMEBIOGAS system. Having a Solar CITIES hand made Gas holding biodigester doubles your capacity for both production and storage and is a good complement for professional commercial systems and a great teaching tool. It is ideal for schools as it involves all of the STEM activities for iterative design and design with the other 90% and for meeting our UN Sustainable Development Goals.
So now let’s move on to the improved Solar CITIES IBC tank primary digester that we’ve been building for almost 15 years.
If you watched our old first video from 7 years ago you will note that we shoed the use of 2 inch pipes in the animation for all three inputs and outputs. That was intended to simplify things where 4 inch pipes and 4 inch uniseals and especially 5-inch hole saws or 5 inch metal cylinders for burning holes in tanks were impossible to get. We wanted to show that if all you have is 2 inch pipes and uniseals and hole saws you can still make a good biodigester.
Naturally, however, it is hard to fit food waste into a 2 inch pipe. We use 4 inch to 2 inch adapters at Janice Kelsey’s house many years ago and they still work effectively but require that the food waste is ground up. Getting a food grinder is often out of the budget or technical capabilities of many families or they simply aren’t available. So, to accommodate UNGROUND food, just like our friends and partners at HomeBiogas, we moved years ago to using 4 inch feedpipes with funnels whenever we could find 4 inch uniseals or their equivalents, like the Israeli ones we find in Palestine, a country where, like during our builds in Turkey and Egypt we can also find fairly inexpensive collections of different sized hole saws.
So, once again, here is how you do it… the Solar CITIES way:

Drill or melt a 5 inch hole into the top of the tank on one of the sides where the surface has flattened out and is smooth. We usually use the corner opposite the drain so that we are thinking of the fluid always flowing toward the drain. This five inch hole will fit the uniseal for your 4 inch feed pipe.

Drill another hole 3 inches in diameter on the other side of the tank diagonal from the feed pipe hole on the part of the tank top that is smooth and flat. This will be for your fertilizer overflow pipe.

For the gas outlet you have a couple of options . If you can find a two inch bulkhead fitting and the cap is smooth, make a 2 ¼ inch hole for the bulkhead and use a 2 inch pipe about 10 inches tall with a reducer to half inch and put in a small section of ½ inch pipe, a half inch ball valve and a half inch barbed hose nipple.
If your tank’s cap already has a two inch threaded hole in it and you can find the appropriate fitting and adapter, use that.
If you are in some countries, like the West Bank Palestine, where these are hard to find, you can make do with the more available half inch or ¾ inch bulkhead fitting and pipes. Just be aware that if you are using manures in your system or if you aren’t grinding your food.these narrow pipes can easily clog with scum and floating bits of food and you will need to unscrew the cap and clean them out from time to time if you find gas isn’t flowing, or remove the gas hose and stick a wire down throught he barbed nipple to dislodge anything blocking gas flow. In any event, try to amek the gas pipe 10 to 12 inches above the tank so the gas valve is above the water line. Remember that in the Solar CITIES design you are keeping the IBC tank always OVERFILLED with water – i.e. the water line is above the top of the tank by several inches at all times – this is why you need a good uniseal fit. It is the water pressure above the tank on both the inlet and outlet pipes that forces the gas out the pipe in the middle as it bubbles up and fills the top of the IBC. The fact that the feed pipe and fertilizer pipe extend so far into the tank means that if you were to close the valve on the gas pipe you would essentially be able to store a large volume of gas in the IBC tank itself. Your biogas will displace water through the fertilizer pipe in equal volume to the amount of gas produced. The trick if you do this is that to get it all out again you need to fill the tank with that equivalent amount of water from the feed pipe. It has always seemed more convenient to us to keep the gas valve open all the time and let the gas accumulate in the floating IBC gas holder. However, you should know that we have built systems with a dedicated IBC water tank above the digester connected to a rain spout coming from the roof. In those systems we would keep the valve closed and let the single IBC tank biodigester be its own gas holder. When we wanted to use the gas we would drain the water tank into the digester. You can refill the water pressurizing tank with either rain capture or a pump. It isn’t an ideal solution, however, for water scarce areas like Palestine.
Smooth the edges of your holes with sandpaper or a knife (or in a pinch with the flat side of the grinder) and use a flexible silicone around the unseals and press them into place for the 4 inch and 3 inch pipes.
For the 4 inch feed pipe, cut out a rectangular section from the bottom of the pipe about four inches long and a couple of inches wide (about half the diameter of the pipe) so that food waste can slide into the bottom of the tank.
You may have to bevel or smooth the edges of the pipe, then soap it up or put rubbing alcohol on it and genetly push it down through the uniseal, twisting as you go. Push it all the way down with the cut side facing toward the center of the tank.
In Europe and the Middle East and some other countries the pipes are fitted together by pressure through rubber washers and they have bulges on one end for the fitting. In the US the pipes are smooth cylinders and are fit together using toxic glues. You have more flexibility regarding which side of the pipe you want to use where and how long you want to make them because you can always cut them later. With the European and Middle Eastern pipes we need to factor in the direction and length of that bulge. For the 4 inch pipe and two inch pipe, , to get the maximum seal, you want to push the pipe down into the uniseal as far as you can so the bulge puts pressure on the uniseal. In this case you may find you need to shorten the pipes a few inches so that they don’t bottom out before the bulge part reaches the uniseal.
Once you have pushed the pipe down until it can’t go any further your feed pipe is in place.


Cut a hole in the center of the 2 inch pipe. This is where the fertilizer that is fully digested will exit the tank. The stuff that sinks to the bottom of the tank and the stuff that floats at the top is still being digested. Only when it is fully digested will it become neutrally buoyant and rise or sink to the middle of the tank so that is where we want to take it out.
We don’t worry about plugging up the bottom of the pipe because it is eventually going to clog with sludge anyway. The liquid fertilizer will seek the path of least resistance and come out the center . Push the pipe down through the uniseal and rotate so that when it is all the way in the tank the hole faces away from the feed pipe and toward the back of the tank. This way it is unlikely that undigested food will find its way around and out. Food waste particles won’t have a direct line from the feed pipe to the outlet pipe.
Up at the top insert a 2 inch elbow, a horizontal pipe and another elbow with a section of vertical pipe. Try to make this pipe bend stand 8 inches above the IBC for best gas pressure. It will still work if it is lower.
 |
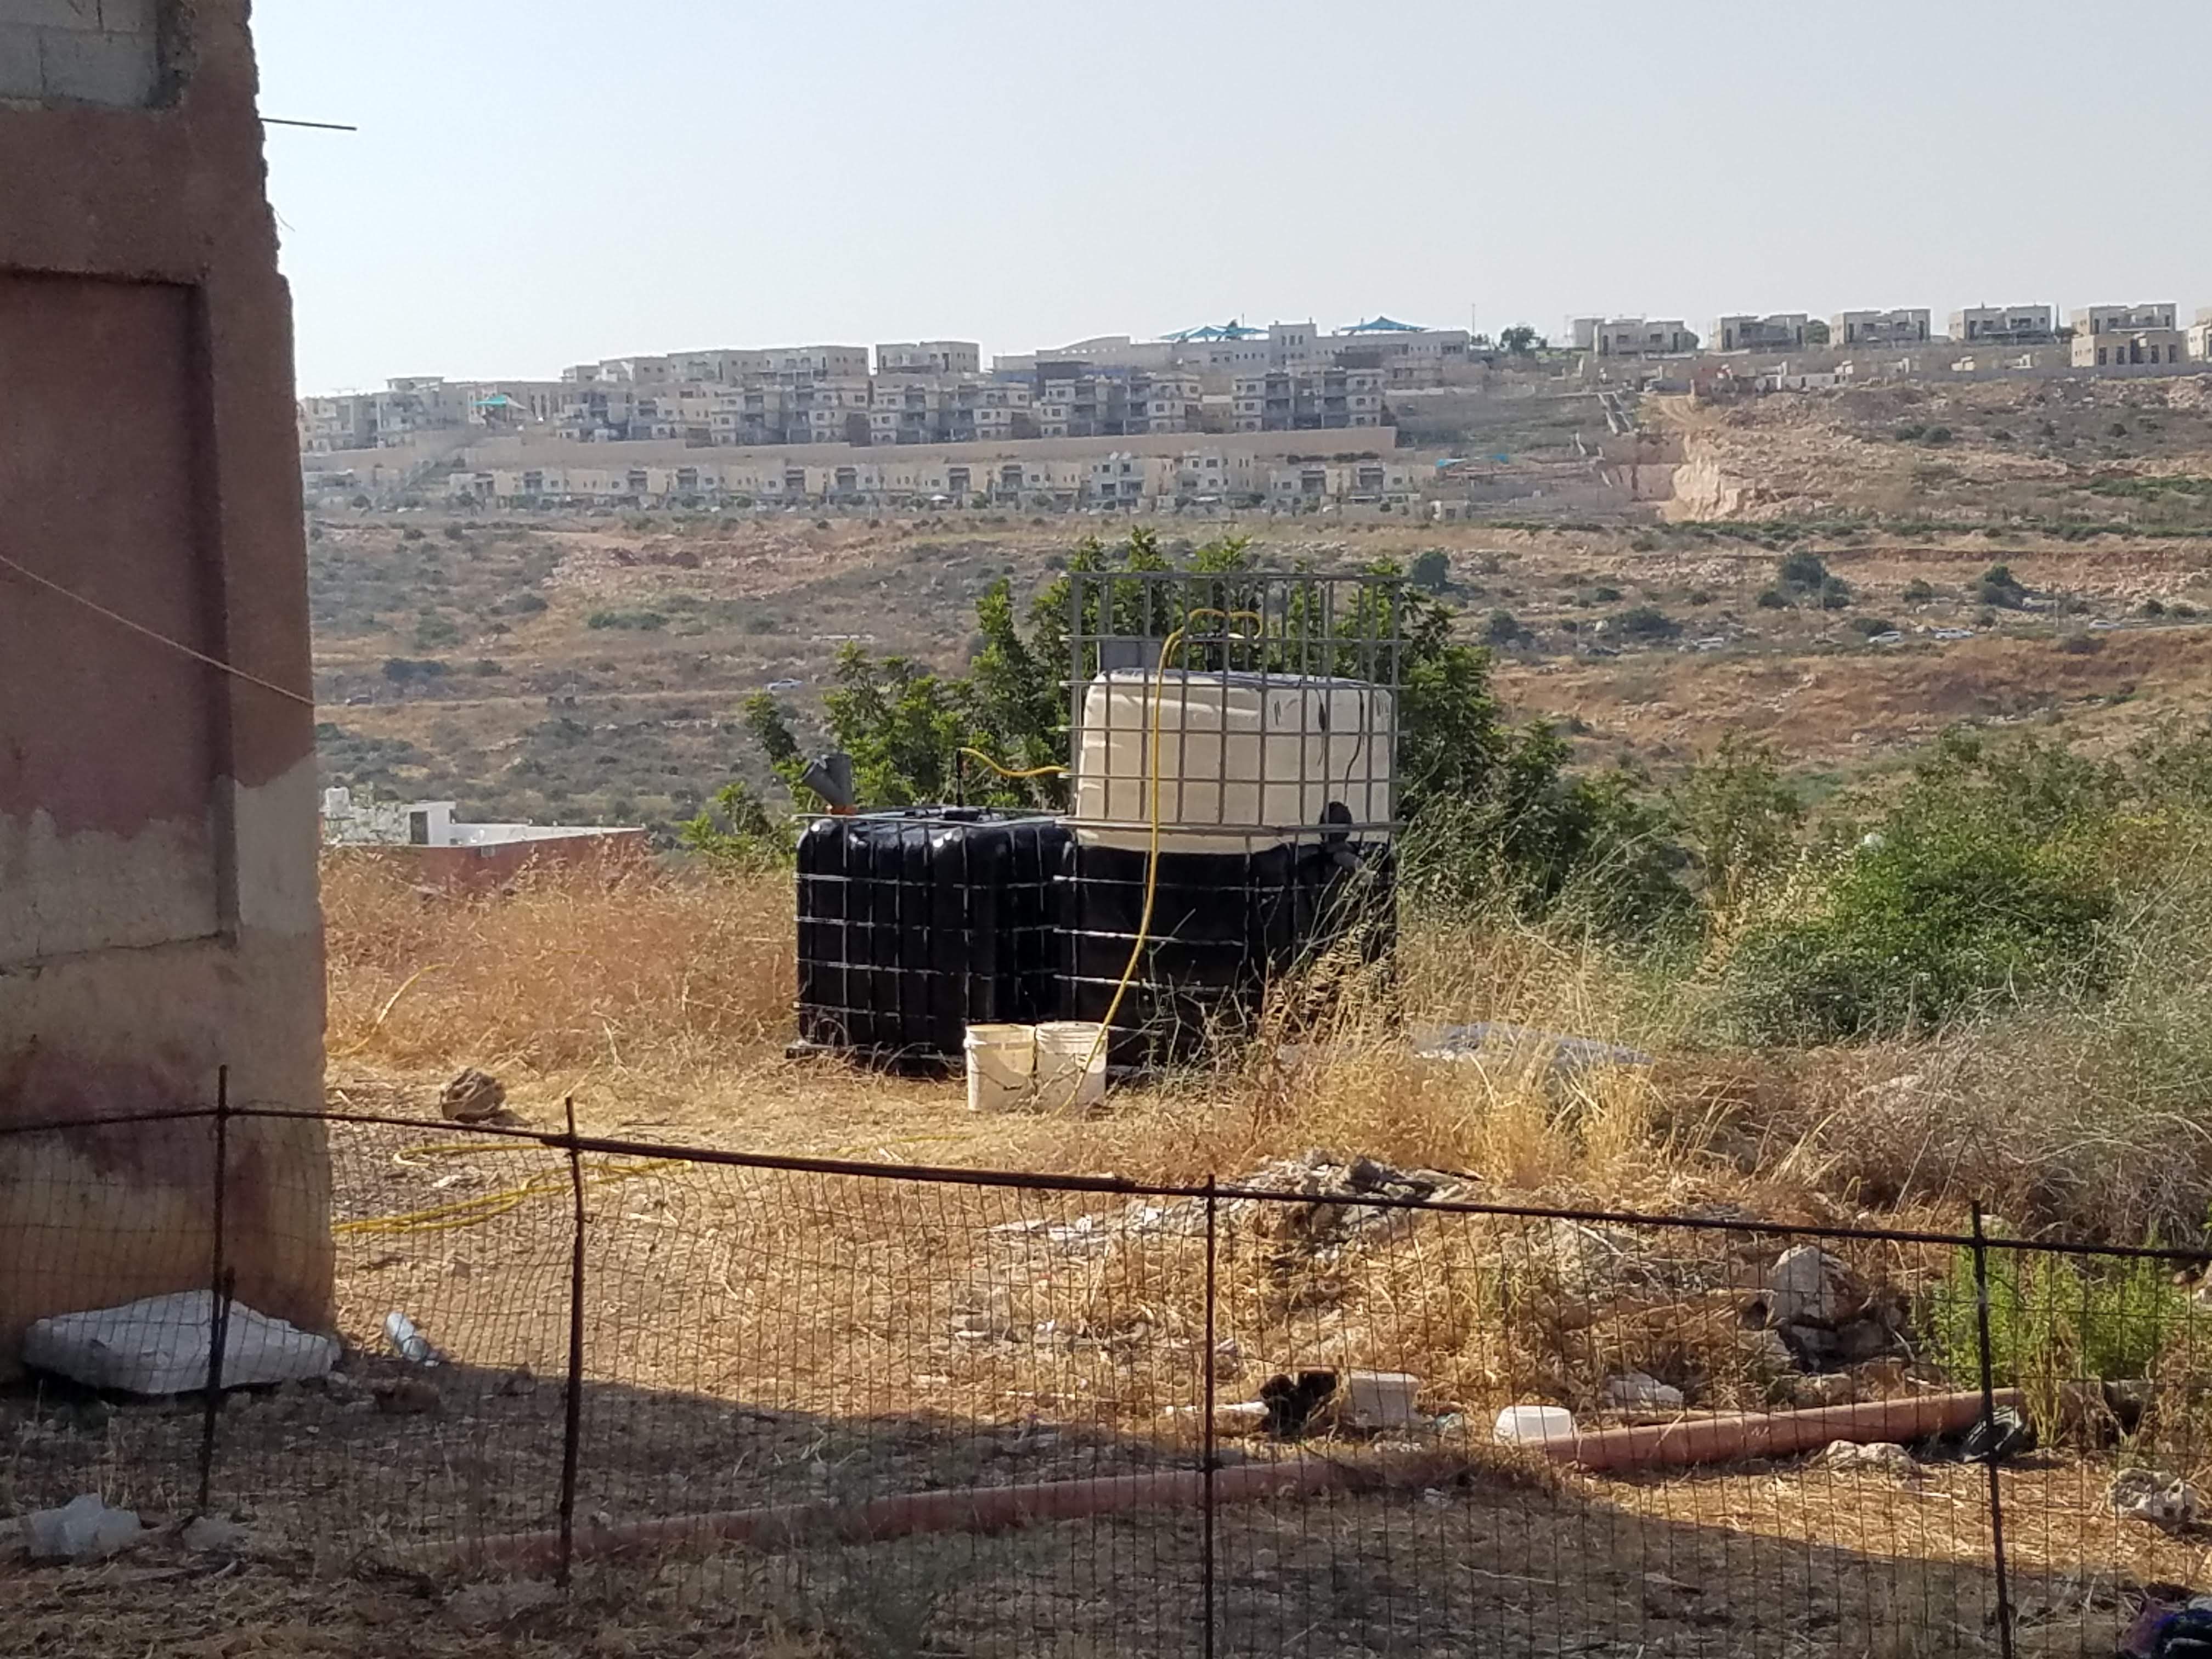
| The single tank on the left is a primary Solar CITIES IBC biodigester before painting. The two tanks (one inside the other) on the right are the secondary Solar CITIES IBC tank digester AND integrated floating gas holder. This picture shows clearly the modifications we make to the gas holder cage, removing the 4 vertical bars on the long sides of the tank and leaving 2 vertical bars intact. This is the trick to fitting another tank, rotated 90 degrees, into the first tank to use as a freely floating gas holder. |
At Solar CITIES we can make this overflow pour into a bucket or directly into the garden but at Solar CITIES we like to extend it over and into the floating IBC digester. We do this by connecting an elbow to the outflow pipe and then a straight section of pipe leading to the gas holder digester with another elbow and a downward facing section of pipe that spills the overflow into the secondary digester. This way we can continue processing/digesting what comes out of the first tank using the second. Make sure you either drill a small hole in the elbow so you don’t get a vapor lock/siphon effect that can drain your primary IBC, or use a T instead of the elbow so you can leave an open section facing skyward to break the possible siphoning.
In Germany the industrial systems we visited usually have at least two massive tanks and they told us that they get about 80% of their gas from the first digester and about 20% from the second. We will still lose 20% of the energy content of what we feed the second digester – it will come out in the fertilizer that exits the outlet pipe, but we accept that loss.
If you really want to maximize your gas winnings you can make a recirculation pipe that continuously sends the overflow of the second tank back to the first and extend the hydraulic retention time of the liquid, that is, the time it stays in the digester until the microbes have consumed every microgram of digestible material.
Normally we aren’t that obsessive, but hey, why not give it a try!?
Solar CITIES encourages our worldwide community of innoventors and practitioners to always innovent and practice-tion. Creating a great biogas system is like getting to Carnegie Hall. How to get there? Practice, practiece. Practice makes perfect-tion.


To finish the input side you need to get the inlet pipe to be a few inches above the output so things don’t back up and spill when you feed. You want to create a downhill flow overall and remember that water seeks its own level. That is a vital concept in biodigester design. Many people wonder how the tanks can always be overfilled with water and still work. In fact the feed pipe is filled a few inches above the outlet pipe so it pushes the fluid through and out as the opposite side tries to equal the height and then spills over, creating a pull action on the feeding side through the tank.
If you can get your hands on some kind of funnel 10 to 12 or 14 inches wide narrowing to 4 inch that is the best for the beast. In the US we use a 4 inch Big Gulp Dust Hood that is usually sold for use in woodshops to vacuum up sawdust. We get them from HomeDepot online.
Here in Palestine we can’t get these so we tend to get a 4 inch Y pipe and shove that into the connection bulge in the feed pipe, gaining us a good 8 inches of height. The angle of the Y piece allows for easier pouring and you can still make a funnel out of tin or sheet metal.
Paint the tank black to keep out the light and to absorb solar heat.


Hook up a flexible rubber hose from the output of the primary digesteor to the side of the T valve in the gas holder and connect another hose from the other side of the gas holder T to your stove. We normally keep the valves connecting the primary and secondary digesters open all the time and keep the valve to the stove closed, but if you have another valve at the stove you can open and close that and leave the valves at the digesters open all the time.
This finishes the plumbing of your Solar CITIES IBC tank biodigester.


You can now fill your primary tank with animal manure or lake mud or RidX or any septic powder and with water. Make sure as you are doing this to soap test all the fittings (the lid, the uniseals, the pipes). Just make up a dishsoap solution and pour it over the tank while you are filling while keeping the valves closed. This will compress the air in the tank and you will see soap bubbles form if there are any leaks. Our lid was leaking so we put silicone in it and rescrewed it. We actually recommend you use marine grease or axle grease instead because then it is easier to unscrew if you need to service it, but we didn't have any the day we built in Palestine and taxis to town to get new supplies are expensive so we used silicone.
All biodigesters are basically the same – they use a watertight and gas tight tank or a floating drum in water, with three pipes in it, one on the input side for feeding, one in the middle for the gas out and one on the output side for the fertiliser slurry to come out. It is easiest and safest from a future leak prevention perspective if all the pipes are going in from the top of the tan so you never have penetrations below the waterline to worry about.

We use the American Sign Language (ASL) sign for I LOVE YOU to teach the concept. I for Input of food waste, L for Liquid Fertilizer Slurry Output and your index finger pointing up in the middle, indicating the gas that rises to heaven. Your palm is the tank, any tank, made out of anything that will hold water. Many people make entire digesters, called salchichas, or “sausage digesters” in Latin America, out of big plastic bags with the same three pipes in them.


What makes our Solar CITIES 3 IBC tank Gas production and storage system unique is that it can be built from tanks and materials that we have found in every country on earth and they are resistant to damage and puncture. These international Intermediate Bulk Containers are standard shipping containers that are literally shipped all over the world. In some countries we’ve found them discarded in the garbage or in junkyards or left by the side of the road or in fields.
With our innovation for storing the gas you don’t even have to worry about gas pressure. You can put weighted boards on top of the gas holder to pressuriize the gas and we’ve also used old car tires effectively this way as they slip over the gas pipe easily and can be weighted with sand or rocks inside the rim of the tire. Or you can simply use bungee cords wrapped around the holder (we find that bungeeing in two locations front and back is sufficient). You simply hook the bungees onto different heights of bars on the cage. As you use up the gas and the tension in the bungee decreaeses, you unhook the bungees and rehook them further down, maintaining the stretch. You keep moving them progressively, every 15 minutes to half hour, using lower and lower rungs on the bottom cage until all the gas is used up. Then you just feed the hungry domestic dragon again and again and wait for it to fill up again. It is the best demonstration of perpetual renewable energy we know, transforming waste into value. EVOLVING FROM THE DIY TO THE PROFESSIONAL:


Of course we know that once you discover the magic of the methanogens in you own hand-built biodigester you will want to upgrade to a beautiful professional system like the all in one HomeBiogas system we’ve been working with for almost 15 years too. It it is engineered to perfection. It is elegant, factory made and reliable, comes in a small box, sets up in an hour and half or so and comes with a great warranty and the latest CE and ISO Standards – in fact HomeBiogas helped create the new


Comments